
Download và upload ảnh sử dụng WCF REST Service trên Windows Phone
Mở đầu
Thể theo yêu cầu của nhiều bạn muốn tìm hiểu về cách thức xử lý download và upload ảnh qua service trong bài viết này chúng ta sẽ cùng đi tìm hiểu cách thức download và upload ảnh sử dụng WCF REST Service trên Windows Phone bằng cách dùng Base64 String. Ứng dụng demo trong bài viết này là ứng dụng đổi avatar của người dùng, một phần không thể thiếu trong các ứng dụng social hiện nay. Bài này ngầm định là các bạn đã biết cách tạo ra và sử dụng các service sử dụng công nghệ WCF REST Service. Nếu bạn chưa biết vui lòng xem qua 2 bài viết sau:
Tạo WCF REST Service download upload ảnh dùng Base64 string
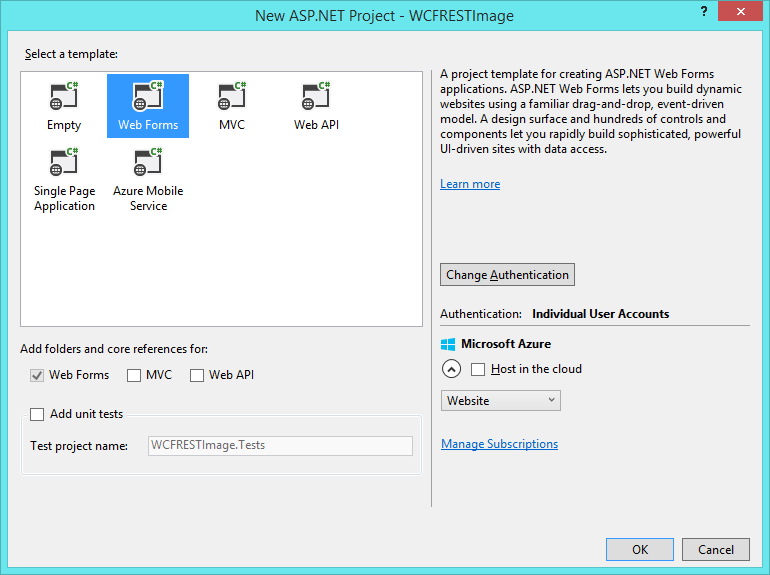
Bước 1: Tạo project web WCFRESTImage và chọn template Web Forms như hình dưới


Bước 2: Tạo folder Services và thêm một WCF Service đặt tên là ImageService
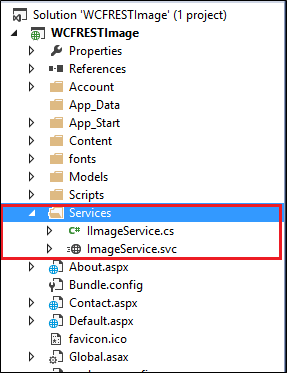
Bước 3: Xóa example DoWork và bổ sung 2 operation vào IImageService như sau:
namespace WCFRESTImage.Services
{
    [ServiceContract]
    public interface IImageService
    {
        [OperationContract]
        [WebGet( RequestFormat=WebMessageFormat.Json, ResponseFormat=WebMessageFormat.Json)]
        UserProfile GetAvatarBase64(int userId);

        [OperationContract]
        [WebInvoke(Method="POST" ,RequestFormat = WebMessageFormat.Json, ResponseFormat = WebMessageFormat.Json)]
        bool SetAvatarBase64(UserProfile userProfile);
    }
}


Ở đây chúng ta sử dụng class UserProfile để lưu thông tin người dùng truyền qua lại giữa client và server
namespace WCFRESTImage.Services
{
    public class UserProfile
    {
        public int UserId { get; set; }
        public string AvatarBase64String { get; set; }
    }
}
Bước 4: Implement 2 operation này như sau:
namespace WCFRESTImage.Services
{
    /// <summary>
    /// Service demo handling image download and upload by WCF REST Service
    /// Created by tungnt.net 2/2015
    /// </summary>
    public class ImageService : IImageService
    {
        #region UseBaseString64

        /// <summary>
        /// Get Avatar image by userId
        /// </summary>
        /// <param name="userId"></param>
        /// <returns></returns>
        /// @Created by tungnt.net - 2/2015
        public UserProfile GetAvatarBase64(int userId)
        {
            string imagePath;
            UserProfile userProfile = new UserProfile() { UserId = userId };
            try
            {
                //For demo purpose I only use jpg file and save file name by userId integer;
                imagePath = HttpContext.Current.Server.MapPath("~/Avatar/") + userId + ".jpg";
                if (File.Exists(imagePath))
                {
                    using (Image img = Image.FromFile(imagePath))
                    {
                        if (img != null)
                        {
                            userProfile.AvatarBase64String = ImageToBase64(img, ImageFormat.Jpeg);
                        }
                    }
                }
            }
            catch (Exception)
            {
                userProfile.AvatarBase64String = null;
            }
            return userProfile;
        }

        private string ImageToBase64(Image image, ImageFormat format)
        {
            string base64String;
            using (MemoryStream ms = new MemoryStream())
            {
                // Convert Image to byte[]
                image.Save(ms, format);
                ms.Position = 0;
                byte[] imageBytes = ms.ToArray();

                // Convert byte[] to Base64 String
                base64String = Convert.ToBase64String(imageBytes);
            }
            return base64String;
        }

        /// <summary>
        /// Save image to Folder's Avatar
        /// </summary>
        /// <param name="userProfile"></param>
        /// <returns></returns>
        /// @Created by tungnt.net - 2/2015
        public bool SetAvatarBase64(UserProfile userProfile)
        {
            bool result = false;
            try
            {
                //For demo purpose I only use jpg file and save file name by userId integer
                if (!string.IsNullOrEmpty(userProfile.AvatarBase64String))
                {
                    using (Image image = Base64ToImage(userProfile.AvatarBase64String))
                    {
                        string strFileName = "~/Avatar/" + userProfile.UserId + ".jpg";
                        image.Save(HttpContext.Current.Server.MapPath(strFileName), ImageFormat.Jpeg);
                        result = true;
                    }
                }
            }
            catch (Exception)
            {
                result = false;
            }
            return result;
        }

        private Image Base64ToImage(string base64String)
        {
            // Convert Base64 String to byte[]
            byte[] imageBytes = Convert.FromBase64String(base64String);
            Bitmap tempBmp;
            using (MemoryStream ms = new MemoryStream(imageBytes, 0, imageBytes.Length))
            {
                // Convert byte[] to Image
                ms.Write(imageBytes, 0, imageBytes.Length);
                using (Image image = Image.FromStream(ms, true))
                {
                    //Create another object image for dispose old image handler
                    tempBmp = new Bitmap(image.Width, image.Height);
                    Graphics g = Graphics.FromImage(tempBmp);
                    g.DrawImage(image, 0, 0, image.Width, image.Height);
                }
            }
            return tempBmp;
        }

        #endregion
    }
}
Ở đây sử dụng cho mục đích demo nên chúng ta sẽ lưu ảnh vào một thư mục tên là Avatar trên server nên nếu chưa có bạn vui lòng tạo ra trước. Bên cạnh đó để cho đơn giản chúng ta sẽ lưu tên file ảnh avatar theo id người dùng dạng integer và fix định dạng ảnh hỗ trợ là jpg. Các bạn có thể mở rộng ra như là lưu avatar vào database thay vì file và hỗ trợ thêm các định dạng ảnh khác.
Bước 5: Cấu hình wcf service trả về dạng JSON:
<system.serviceModel>
  <behaviors>
    <endpointBehaviors>
      <behavior name="restBehavior">
        <webHttp helpEnabled="true" />
      </behavior>
    </endpointBehaviors>
    <serviceBehaviors>
      <behavior name="">
        <serviceMetadata httpGetEnabled="true" httpsGetEnabled="true" />
        <serviceDebug includeExceptionDetailInFaults="false" />
      </behavior>
    </serviceBehaviors>
  </behaviors>
  <serviceHostingEnvironment aspNetCompatibilityEnabled="true"
    multipleSiteBindingsEnabled="true" />
  <services>
    <service name="WCFRESTImage.Services.ImageService">
      <endpoint address="rest" behaviorConfiguration="restBehavior"
        binding="webHttpBinding" bindingConfiguration="" contract="WCFRESTImage.Services.IImageService" />
    </service>
  </services>
</system.serviceModel>
Đến đây các bước chuyển bị service đã hoàn tất chúng ta cùng bước vào phần tiếp theo
Tạo ứng dụng Windows Phone cho phép đổi avatar người dùng
Ở bước kế tiếp này chúng ta sẽ tạo ra một ứng dụng demo việc đổi avatar cho người dùng như sau:
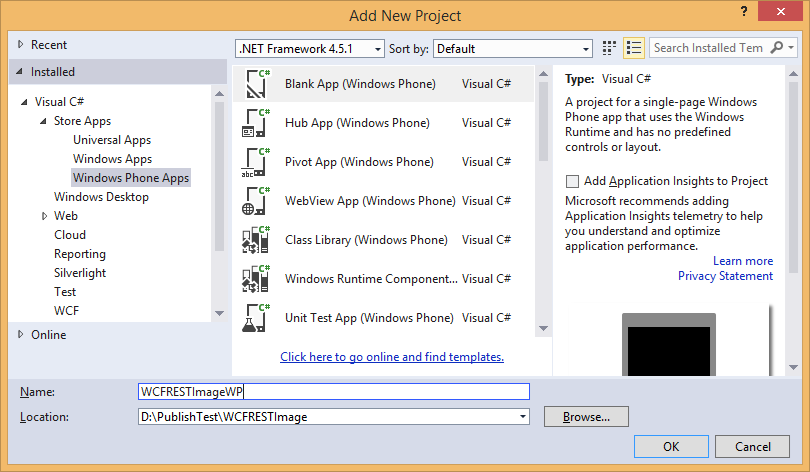
Bước 1: Thêm 1 project Windows Phone Apps, chọn template Blank App và đặt tên là WCFRESTImageWP
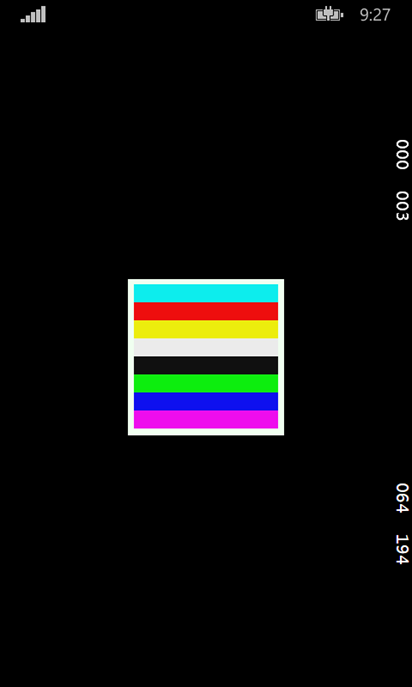
Bước 2: Thiết kế UI MainPage.xaml chỉ gồm có một control Image Avatar, Avatar sẽ hiển thị khi người dùng chạy ứng dụng và cho phép đổi Avatar khi người dùng chạm vào Image này
<Grid>
    <Grid Margin="0 40 0 40"
          Height="152"
          Width="152"
          Tapped="Grid_Tapped"
          Background="Honeydew">
        <Grid.RowDefinitions>
            <RowDefinition Height="auto" />
        </Grid.RowDefinitions>
        <Border CornerRadius="5"
                BorderBrush="Brown">
            <Image Width="140"
                   x:Name="imgAvatar"
                   Margin="0 5 0 0"
                   Stretch="Fill"
                   Height="140"
                   Grid.Row="0"
                   />
        </Border>
    </Grid>
</Grid>
Bước 3: Viết code trong method OnNavigatedTo để GetAvatar và hiển thị lên trên Image. Chú ý cần tạo ra class UserProfile tương tự như trên server để sử dụng và sử dụng lại thư viện POST/GET dữ liệu đã biết trong các bài viết trước
protected async override void OnNavigatedTo(NavigationEventArgs e)
{
    try
    {
        //For demo purpose we fix userId = 1
        string base64String = await WCFRESTServiceCall("GET", "GetAvatarBase64?userId=" + userId);
        userProfile = JsonConvert.DeserializeObject<UserProfile>(base64String);
        if (userProfile.AvatarBase64String != null)
        {
            SetAvatarFromBase64String(userProfile.AvatarBase64String);
        }
    }
    catch (Exception)
    {
        throw;
    }
}

/// <summary>
/// Utility function to get/post WCFRESTService
/// </summary>
/// <param name="methodRequestType">RequestType:GET/POST</param>
/// <param name="methodName">WCFREST Method Name To GET/POST</param>
/// <param name="bodyParam">Parameter of POST Method (Need serialize to JSON before passed in)</param>
/// <returns></returns>
/// Created by tungnt.net - 1/2015
private async Task<string> WCFRESTServiceCall(string methodRequestType, string methodName, string bodyParam = "")
{
    string ServiceURI = "http://localhost:5550/Services/ImageService.svc/rest/" + methodName;
    HttpClient httpClient = new HttpClient();
    HttpRequestMessage request = new HttpRequestMessage(methodRequestType == "GET" ? HttpMethod.Get : HttpMethod.Post,
ServiceURI);
    if (!string.IsNullOrEmpty(bodyParam))
    {
        request.Content = new StringContent(bodyParam, Encoding.UTF8, "application/json");
    }
    HttpResponseMessage response = await httpClient.SendAsync(request);
    string returnString = await response.Content.ReadAsStringAsync();
    return returnString;
}
Sau khi lấy được base64 string từ service, trong hàm SetAvatarFromBase64String chúng ta sẽ dùng DataWriter và Stream để tạo ra BitmapImage và gán cho Image Avatar:


/// <summary>
/// Set Avatar Image From Base64String use InMemoryRandomAccessStream
/// </summary>
/// <param name="base64String"></param>
/// @created by tungnt.net - 2/2015
private void SetAvatarFromBase64String(string base64String)
{
using (InMemoryRandomAccessStream ms = new InMemoryRandomAccessStream())
{
using (DataWriter writer = new DataWriter(ms.GetOutputStreamAt(0)))
{
byte[] imageBytes = Convert.FromBase64String(base64String);
writer.WriteBytes((byte[])imageBytes);
writer.StoreAsync().GetResults();
}
var image = new BitmapImage();
image.SetSource(ms);
imgAvatar.Source = image;
}
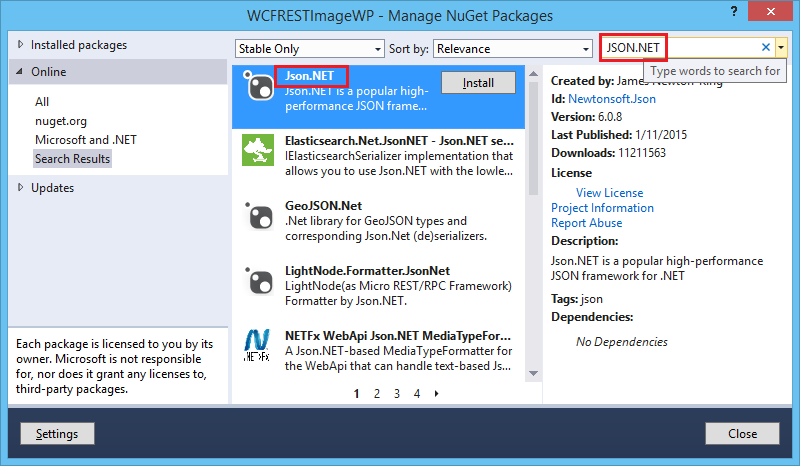
}Ở đây chúng ta sử dụng thư viện Json.NET để serialize string JSON thành object UserProfile, bạn có thể thêm thư viện này qua NuGet.
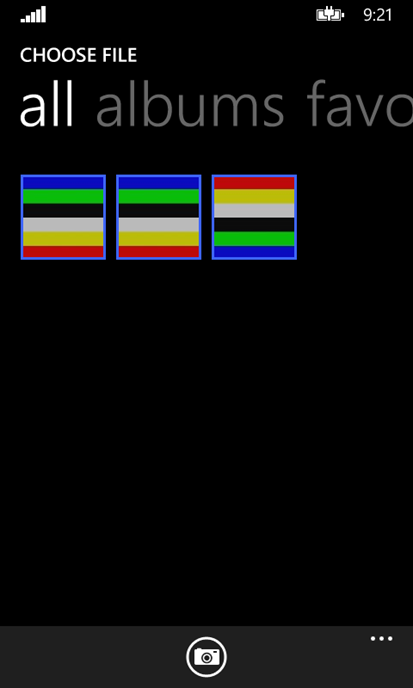
Bước 4: Viết code cho sự kiện Tapped của Grid để đổi Avatar như sau:
private void Grid_Tapped(object sender, TappedRoutedEventArgs e)
{
    try
    {
        var openPicker = new FileOpenPicker
        {
            SuggestedStartLocation = PickerLocationId.PicturesLibrary,
            ViewMode = PickerViewMode.Thumbnail
        };

        //Filter to include a sample subset of file types.
        //For demo purpose we only use jpg image
        openPicker.FileTypeFilter.Clear();
        //openPicker.FileTypeFilter.Add(".jpeg");
        //openPicker.FileTypeFilter.Add(".bmp");
        //openPicker.FileTypeFilter.Add(".png");
        openPicker.FileTypeFilter.Add(".jpg");

        //Handle Activated event for SetAvatar and POST to service after choose image
        view.Activated += viewActivated;
        openPicker.PickSingleFileAndContinue();
    }
    catch (Exception)
    {
        throw;
    }
}
Chúng ta dùng FileOpenPicker để lấy ảnh trong PictureLibrary và Filter loại file cho phép sử dụng là jpg, bạn có thể bổ sung filter để hỗ trợ thêm các định dạng ảnh khác nhưng cần chú ý sửa lại phần server cho tương ứng. Sau đó chúng ta bắt event Activated của CurrentView để POST avatar lên service và set lại ảnh avatar mới sau khi chọn ảnh avatar từ thư viện ảnh như sau:
private async void viewActivated(CoreApplicationView sender, IActivatedEventArgs args)
{
    view.Activated -= viewActivated;
    FileOpenPickerContinuationEventArgs fileOpenPickerEventArgs = args as FileOpenPickerContinuationEventArgs;
    if (fileOpenPickerEventArgs != null)
    {
        if (fileOpenPickerEventArgs.Files.Count == 0) return;
        StorageFile file = fileOpenPickerEventArgs.Files[0];
        if (file != null)
        {
            IRandomAccessStream fileStream = await file.OpenAsync(FileAccessMode.Read);
            string errorMessage = null;
            try
            {
                bool setAvatarResult = await PostAvatarToService(fileStream);
                if (setAvatarResult)
                {
                    SetAvatarFromBase64String(userProfile.AvatarBase64String);
                }
            }
            catch (Exception exception)
            {
                errorMessage = exception.Message;
            }

            if (!string.IsNullOrEmpty(errorMessage))
            {
                var dialog = new MessageDialog(errorMessage);
                await dialog.ShowAsync();
            }
        }
    }
}
Trong event viewActivated chúng ta sẽ lấy ra file vừa chọn sau đó POST lên service qua method PostAvatarToService, nếu thành công thì sẽ set lại ảnh avatar mới cho Image bằng method SetAvatarFromBase64String
/// <summary>
/// Post avatar to wcf rest service from RandomAccessStream
/// </summary>
/// <param name="fileStream"></param>
/// <returns></returns>
/// @created by tungnt.net - 2/2015
private async Task<bool> PostAvatarToService(IRandomAccessStream fileStream)
{
    bool setAvatarResult = false;
    using (InMemoryRandomAccessStream ms = new InMemoryRandomAccessStream())
    {
        using (DataReader reader = new DataReader(ms.GetInputStreamAt(0)))
        {
            byte[] imageBytes = new byte[fileStream.Size];
            await fileStream.ReadAsync(imageBytes.AsBuffer(), (uint)fileStream.Size, Windows.Storage.Streams.InputStreamOptions.None);
            string avatarBase64String = Convert.ToBase64String(imageBytes);
            userProfile.AvatarBase64String = avatarBase64String;
        }
    }
    setAvatarResult = JsonConvert.DeserializeObject<bool>(await WCFRESTServiceCall("POST", "SetAvatarBase64", JsonConvert.SerializeObject(userProfile)));
    return setAvatarResult;
}
Mọi thứ đã hoàn tất các bạn có thể chạy thử ứng dụng, trước khi chạy thử chúng ta cần set cho 2 project web service và windows phone startup cùng lúc như sau:
Right-click Solution và chọn Properties
Tại đây chọn Startup Projects, đổi từ Single sang Multiple startup projects và chọn Action cho 2 project cùng là Start và click OK


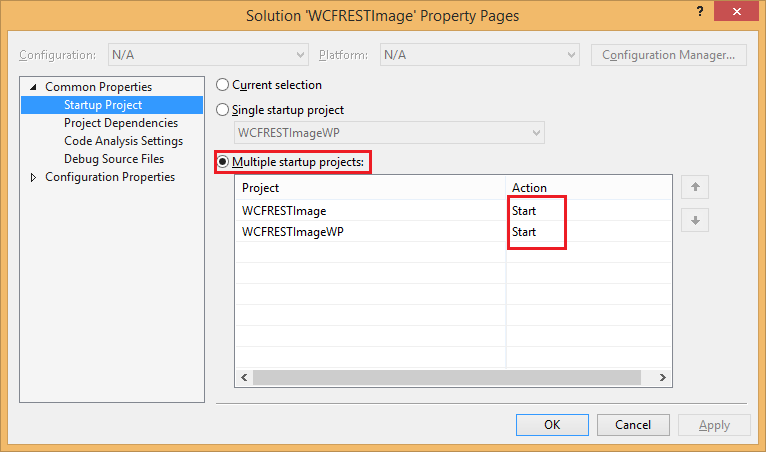
Bây giờ chỉ cần Ctrl+F5 để hưởng thụ thành quả vừa xây dựng xong.

Kết luận
Trong bài viết này tôi đã hướng dẫn các bạn cách xây dựng service xử lý download và upload ảnh sử dụng WCF REST Service trên Windows Phone bằng cách dùng Base64 String qua một ứng dụng demo thay đổi Avatar của người dùng. Cách thức sử dụng Base64 String có ưu điểm là sử dụng string nên việc xử lý ở phần service và client đều đơn giản nhưng chúng cũng có nhược điểm rất lớn đó là dữ liệu chuyển thành dạng base64 nên dung lượng sẽ lớn hơn ảnh thật thêm khoảng 30%.
Trong các bài viết sau chúng ta sẽ cùng tìm hiểu các cách thức xử lý ảnh trên các công nghệ .NET khác. Hy vọng bài viết này sẽ giúp ích cho các bạn trong quá trình xây dựng các ứng dụng của riêng mình. Nếu bạn có bất kì câu hỏi hay kinh nghiệm nào hãy chia sẻ bằng comment bên dưới bài viết và đừng quên chia sẻ cho bạn bè nếu thấy hữu ích.
Happy coding. Stay tuned.
P/s: Source code example các bạn có thể download tại đây: WCFRESTImage